Thursday, October 15, 2009

STOTT PILATES® Five Basic Principles: Principal 1 Breathing

Principal 1 Breathing
*BREATHING PROPERLY PROMOTES effective oxygenation of the blood, focuses the mind on each task and helps to avoid unnecessary tension (particularly in the neck, shoulders and mid-back) during exercise.

Exhaling deeply helps activate the deep support muscles. When inhaling or exhaling, activation of the transversus abdominis helps enable the lumbo-pelvic region to remain stable throughout an exercise.

A three-dimensional breath pattern is encouraged, expanding the rib cage in all directions without neglecting lateral and posterior portions. During exhalation the rib cage closes in and down while the spine flexes slightly. For this reason, an exhale is suggested to accompany and facilitate spinal flexion. During inhalation, the rib cage opens out and up while the spine extends slightly. Therefore, an inhale is suggested to accompany and facilitate spinal extension. An exhale may be suggested during spinal extension in order to maintain abdominal recruitment to help stabilize and support the lumbar spine.

**In all exercises, the breath and awareness of stabilization should precede the actual movement.

*NOTICING NATURAL BREATH PATTERN
With body supine, breathe smoothly, noticing the natural breath pattern. Is one area affected more than others: the abdominal cavity, upper chest, sides or back of the rib cage?

*ABDOMINAL WALL ENGAGEMENT
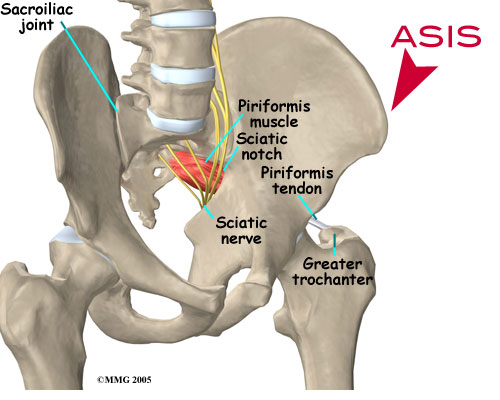
The abdominal wall (transversus abdominis in particular), which is a support for the inner organs, also aids in forcing air out of the body as it compresses the abdominal cavity. Contraction of the deep pelvic floor muscles will aid in firing the transversus. Activation of these deep stabilizing muscles should be incorporated into the breath pattern. Feel the pelvic floor muscles gently contracting and lifting. Try seated or on all fours. To feel activation of the transversus, lie in a neutral position and place fingertips just medially to ASIS (anterior superior iliac spine). On an exhale, engage the transversus to draw the abdominal wall gently toward the spine, feeling it
become taut beneath the fingers, as the pelvic floor contracts. Breathing in through the nose and out through the mouth can help regulate the breath and encourage a fuller breath pattern. Exhaling through slightly pursed lips facilitates a deeper contraction of the abdominal muscles.
**BREATHING SUPINE (lying on back)
Inhale Breathe in through the nose, expanding rib cage three-dimensionally.
Exhale Exhale through pursed lips, focusing first on gentle pelvic floor and
transversus engagement. As you exhale more deeply, the obliques will be
engaged to help press the air out.
Inhale Breath in through the nose, maintaining engagement, feel lateral
expansion of rib cage.
Exhale As before.


The Introduction of the Five Basic Principles
Principal 2 Pelvic Placement
Principal 3 Rib Cage Placement
Principal 4 Scapular Stabilization
Principal 5 Head and Cervical Placement


Article by Moira Merrithew, STOTT PILATES® Executive Director, Education
(taken from http://www.stottpilates.com/aboutus/resources/PDFs/4B-SP_5basic%20principles.pdf

STOTT PILATES® Five Basic Principles: Principal 2 Pelvic Placement

Principal 2 Pelvic Placement

*IT IS KEY TO EMPHASIZE stabilization of the pelvis and lumbar spine both statically and dynamically in all positions and throughout all movements. Two positions often referred to are neutral and imprint. In a neutral position, the natural anteriorly convex curve of the lumbar spine is present. When lying supine, the triangle formed by the ASIS and the symphysis pubis should be parallel to the mat. This is the most stable and optimal shock-absorbing position and a good place from which to promote efficient movement patterns. Neutral alignment should not be achieved by forcibly arching the back, but rather by allowing the weight of the sacrum to rest on the mat. While breathing, and with the transversus abdominis engaged, no strain should be felt through the spinal extensors in the lumbar area. If muscular tension occurs, shift the pelvis slightly toward a posterior placement. It is more important for the lumbar area not to strain than for the ASIS and symphysis pubis to lie in the same horizontal plane. For example, someone with large gluteals might actually create an exaggerated lordosis in the lumbar spine by trying to have the ASIS and symphysis pubis lie in the same plane. An imprinted position combines a slight posterior pelvic tilt with slight lumbar flexion. The normal curve of the lumbar spine lengthens toward flexion by engaging the oblique abdominals to approximate the pelvis and the rib cage anteriorly.When supine, the pubic bone will be slightly higher than the ASIS. The pelvis is not so tilted that the sacrum curls off or loses contact with the mat. It is not necessary to press the lower back all the way into the mat or to tuck under by overusing the rectus abdominis and gluteal muscles respectively. The degree of contact between the lumbar spine and the mat will differ from person to person. An imprinted position should be used to ensure stability of the pelvis and lumbar spine, if neutral alignment cannot be stabilized. When there is weakness in the obliques and other abdominals, placing them in this
slightly shortened position can help maintain their engagement. This will often be useful when certain postural tendencies are present (for example, lordosis).When one or two feet are secure on the mat or other apparatus in a closed kinetic chain, the pelvis and lumbar spine are ideally neutral. When both feet are off the floor in an open kinetic chain, the pelvis and lumbar spine should be in an imprinted position at first.Once enough strength has been developed through theabdominal muscles to achieve stability, a neutral position can be maintained in an open kinetic chain.

*EXPERIMENTING WITH PELVIC PLACEMENT Start supine, with pelvis and spine neutral. Knees flexed, feet abducted hip-distance apart on the mat. Arms long by sides, palms down.

**ROCKING PELVIS
Rock pelvis through anterior and posterior tilts to explore the range of movement. Neutral position will be somewhere between the two.

**LEG SLIDES
Test stability in a neutral position by sliding one foot along the mat, then drawing it back in. Limit the range of motion to where the lumbo-pelvic region can be stabilized.
Inhale To slide foot away.
Exhale To return.

**NEUTRAL TO IMPRINT
Inhale Maintain a neutral alignment.
Exhale Contract abdominals and imprint.
Inhale Maintain an imprinted position.
Exhale Return to neutral.


The transversus abdominis remains engaged throughout while the obliques shorten during imprint, and lengthen during return to neutral. Try lifting one or two feet off the floor to test the stability of the imprint


The Introduction of the Five Basic Principles
Principal 1 Breathing
Principal 3 Rib Cage Placement
Principal 4 Scapular Stabilization
Principal 5 Head and Cervical Placement


Article by Moira Merrithew, STOTT PILATES® Executive Director, Education
(taken from http://www.stottpilates.com/aboutus/resources/PDFs/4B-SP_5basic%20principles.pdf

STOTT PILATES® Five Basic Principles: Principal 3 Rib Cage Placement

Principal 3 Rib Cage Placement


*THE ABDOMINAL WALL ATTACHES to the lower ribs. The abdominal muscles must often be recruited to maintain the rib cage, and indirectly, the thoracic spine, in proper alignment. Often the rib cage will tend to lift up in the supine position or deviate forward in a sitting position, extending the thoracic spine. Pay particular attention while inhaling or elevating the arms. When supine in neutral, maintain a sense of the weight of the ribs resting gently on the mat, neither lifting away nor pushing into the mat. Emphasize breathing three-dimensionally into the rib cage during inhalation. neutral Allow the two sides of the rib cage to close toward each other during exhalation. Avoid overly depressing the rib cage, which will flex the thoracic spine, possibly extending the cervical spine and may deactivate the transversus abdominis. When flexing, the rib cage will slide toward the pelvis anteriorly. When extending, allow the rib cage to open to facilitate thoracic extension. It is important to not completely relax the abdominals during extension, otherwise a loss of spinal stability will result.

**EXPERIMENTING WITH RIB CAGE PLACEMENT
Start supine, with pelvis and spine neutral. Knees flexed, feet abducted hip-distance apart on the mat. Arms long by sides, palms down.
ARM RAISES
Inhale Reach arms to the ceiling, palms facing one another.
Exhale Reach arms overhead, only as far as abdominal connection and contact between the rib cage and mat can be maintained.
Inhale Reach arms to the ceiling.
Exhale Lower arms down by sides


***picture below shows ribs popping, always avoid this position!


The Introduction of the Five Basic Principles
Principal 1 Breathing
Principal 2 Pelvic Placement
Principal 4 Scapular Stabilization
Principal 5 Head and Cervical Placement


Article by Moira Merrithew, STOTT PILATES® Executive Director, Education
(taken from http://www.stottpilates.com/aboutus/resources/PDFs/4B-SP_5basic%20principles.pdf

STOTT PILATES® Five Basic Principles: Principal 4 Scapular Stabilization

Principal 4 Scapular Stabilization

*STABILIZING THE SCAPULAE on the rib cage is as important as contracting the abdominal muscles during the initiation of every exercise. When stability is
absent, there is a tendency to overwork muscles around
the neck and shoulders. Be aware of scapular stabilization at all times, whether
there is movement of the arms and spine or not. Since they lack a direct bony attachment to the rib cage and spine, the scapulae have a great deal of mobility.
In making a greater range of motion available to the arms, the scapulae can glide upward, downward, inward and outward, and can also rotate upward or downward. Although the scapulae move with the arms, a sense of stability, not rigidity, should always be maintained. Keep the feeling of the ears reaching away from the shoulders, even though they may actually be elevating, as is the case when the arms lift overhead. A sense of width should be maintained across the front and back of the shoulder girdle. The shoulders should not be allowed to overly round forward or squeeze completely together. The scapulae should lie flat on the rib cage and glide across it without coming away from it. Be aware that an individual’s neutral placement of the scapulae may be slightly different from their natural resting position. An ideal working alignment must be established for each individual.

**EXPERIMENTING WITH SCAPULAR MOVEMENT AND STABILIZATION
Start supine, with pelvis and spine neutral. Knees flexed, feet abducted hip-distance apart on the mat. Arms long by sides, palms down.

**SCAPULA ISOLATIONS
(ELEVATION, supine)
Inhale Elevate scapulae, lifting shoulders toward ears.
Exhale Return scapulae to neutral, sliding shoulders down away from ears (avoid rounding shoulders forward as they slide down).

**SCAPULA ISOLATIONS
(DEPRESSION, supine)
Inhale Depress scapulae, drawing shoulders away
from ears.
Exhale Return scapulae to neutral.


**SCAPULA ISOLATIONS
(PROTRACTION, seated or supine)
Inhale Protract scapulae, widening between
shoulder blades.
Exhale Bring scapulae back to neutral, with feeling
of opening collarbone.


**SCAPULA ISOLATIONS
(RETRACTION, seated or supine)
Inhale Retract scapulae, bringing shoulder blades
closer together.
Exhale Bring scapulae back to neutral.


The Introduction of the Five Basic Principles
Principal 1 Breathing
Principal 2 Pelvic Placement
Principal 3 Rib Cage Placement
Principal 5 Head and Cervical Placement


Article by Moira Merrithew, STOTT PILATES® Executive Director, Education
(taken from http://www.stottpilates.com/aboutus/resources/PDFs/4B-SP_5basic%20principles.pdf

STOTT PILATES® Five Basic Principles: Principal 5 Head and Cervical placement

Principal 5 Head and Cervical placement

*THE CERVICAL SPINE SHOULD hold its natural curve and the skull should
balance directly above the shoulders when sitting in neutral. This position should also be maintained when lying on the back. If there is a kyphosis or forward head posture, pads or pillows under the head may be necessary in a supine position to prevent the cervical spine from overextending. In most instances, the cervical spine should continue the line created by the thoracic spine during flexion, extension, lateral flexion and rotation. Cervical flexion should begin by lengthening the back of the neck. This is referred to as cranio-vertebral flexion. Avoid jamming the chin into the chest. There should be enough room between chin and chest to fit a small fist. Once cranio-vertebral flexion and scapular stabilization are established, the upper torso can be flexed by contracting the abdominals to slide the rib cage toward the pelvis. When flexing the upper torso, focus on creating an even flexion through the thoracic and cervical spine. When extending the upper torso, focus on creating an even extension through the thoracic and cervical spine. Avoid creating overextension and compression in the
cervical area.

**EXPERIMENTING WITH HEAD AND CERVICAL PLACEMENT
Start supine, with pelvis and spine neutral.
Knees flexed, feet abducted hip-distance apart
on the mat. Arms long by sides, palms down.

**CRANIO-VERTEBRAL FLEXION
(also known as Head Nods)
Inhale Drop eye focus slightly, tipping head forward and lengthening back of neck. Leave head on the mat.
Exhale Return to neutral.


The Introduction of the Five Basic Principles
Principal 1 Breathing
Principal 2 Pelvic Placement
Principal 3 Rib Cage Placement
Principal 4 Scapular Stabilization


Article by Moira Merrithew, STOTT PILATES® Executive Director, Education
(taken from http://www.stottpilates.com/aboutus/resources/PDFs/4B-SP_5basic%20principles.pdf

Tuesday, October 13, 2009

Pilates Ab Prep

*1.
Starting position: Pelvis and spine neutral, knees flexed, feet hip-distance apart on mat. Arms by side, palms down.
*2.
Inhale: lengthen back of neck to create slight cranio-vertebal flexion.
*3.
Exhale: Maintain position as you contract abdominals to slide rib cage toward pelvis and flex thoracic spine, reach arms off mat level with shoulders. Inhale: hold position by maintaining abdominal contraction while breathing into rib cage.
*4.
Exhale: roll upper body down to mat, allowing cervical spine to return to neutral once head is on mat, simultaneously lower arms. Complete 5-10 reps.


(taken from http://www.healthandlifestyle.ca/Fitness/crunches.aspx)

Thursday, September 24, 2009

Sun Salutation: Surya Namaskar; How to Salute the Sun

by Leila Easa
http://www.yogajournal.com/practice/1040

Surya Namaskar: The sequence of 8 postures can be a complete practice in itself, or can prepare you for a longer asana routine. Sun Salutes are often performed in sets of 5, but if you are new to the practice it's wise to begin with 2 or 3. Each time you flow through this sequence, synchronize your breath with the movements of your body.

1.
To begin, stand in Tadasana (Mountain Pose). Distribute your weight evenly over both feet. Establish a slow, steady rhythm for your breath. Find your center.


2. Next, inhale and stretch your arms out to the side and overhead into Reach your heart and arms to the heavens, sending your greeting to the sun.

3. As you exhale, hollow out your belly and fold into Uttanasana (Standing Forward Bend), connecting down into the earth. Keep your legs firmly engaged.


4. Inhale and lengthen your spine forward into Ardha Uttanasana (Half Standing Forward Bend). In this pose, the gaze is lifted, the spine is extended, and the fingertips can stay on the floor or rise to the shins.

5. Exhale and step or lightly hop your feet back behind you into Plank Pose. Your wrists should be flat on the floor, shoulder-distance apart, and your feet should be at hip distance. Take a full breath in as you lengthen through your spine.

6. Exhale and lower into Chaturanga Dandasana (Four-Limbed Staff Pose), keeping your legs straight and pushing back into your heels or bringing your knees to the floor. Build heat in the center of your body as you hold this challenging posture.


7. Inhale and carve your chest forward into Urdhva Mukha Svanasana (Upward-Facing Dog), directing that energy out from your heart. Pull your shoulders back and open your collarbones. Engage your legs but relax your gluteal muscles.

8. Exhale and roll over the toes, coming into Adho Mukha Svanasana (Downward-Facing Dog Pose). Ground down through your hands and feet as you lengthen your spine. Remain here for five breaths.

9. On your fifth exhale, bend your knees and look between your hands. Then inhale and step or lightly hop your feet between your hands, returning to Ardha Uttanasana (Half Standing Forward Bend).


10. Exhale back to Uttanasana (Standing Forward Bend), surrendering into the fold.

11. Inhale, reaching your arms out wide to your sides and coming to stand through a flat back. Feel a renewed sense of energy as you draw your arms overhead into Urdhva Hastasana (Upward Hand Pose).

12. Exhale and return to Tadasana (Mountain Pose), your home base. Remain here for a few breaths, feeling the movement of energy through your body, or continue on to your next salute.

(taken from http://www.yogajournal.com/practice/1040)

Tuesday, September 1, 2009

Summer is over. Time for classes again!


Fall Minneapolis Community Ed classes are posted and it is time to sign up!


I am teaching four classes this session as long as they all fill up.
Pilates Beginning; Mon and Tuesday eve. 6pm-7pm
Pilates Yoga Power Sculpt; Mon eve. 7:15-8:15pm
Pilates Intermediate; Tuesday eve. 7:15-815pm


All classes are being held at Washburn H.S. for the fall session.


This is a link to the exercise page on the Minneapolis Community Ed web page, you will have to scroll down to my classes or click search for classes on the right of the page and then under instructor search for Quarstad, Susie

Search for a Class
Hope to see some familiar faces in my classes this fall!!!

Friday, May 1, 2009

Pilates Principal: Pelvic Placement; Neutral vs. Imprint

In pilates there is a focus of two placements of the lumbar spine (very low back) and pelvic region. These two placements are the neutral or imprinted positions.
It should be clear at all times in pilates whether you are in neutral or imprint. There are several occasions when you might be in a passing through position, in the event of spinal articulation.

The pelvic region holds the largest percentage of the body’s weight load; therefore, it is important to grasp the idea of stability and mobility in this region.

Neutral Pelvic Position

Neutral position is the most stable and shock-absorbing position that we can put our pelvis and lumbar spine in; therefore, it is pilates class but also in our daily life.
the ideal position for us to be in, not only in When you see a person lying (stomach facing up) on the floor in neutral position often you will see a slight curve in the low back, this is normal. Naturally, anatomically, we have a slight curve in the lumbar region.
However, to find your own neutral do not judge by the amount of space between your low back and the floor. (Look below for instructions on how to find neutral pelvis.)

Imprint Pelvic Position
This position is generally used for certain body types and is also used in the beginning to ensure stability of the pelvis and lumbar spine region if neutral position cannot be maintained. This position is also great for stabilizing weak abdominal obliques, with neutral being the ideal placement goal.
Often when you see a person lying down in imprinted position you do not see a space between their lumbar region and the floor. It is important to note that the low back is not jammed into the floor; rather it is lengthened almost parallel to the floor.

(taken from http://thinkpilates.com/pilates-basic-principle-pelvic-area/)

Thursday, April 30, 2009

About the STOTT PILATES Method

STOTT PILATES is a contemporary approach to the original exercise method pioneered by the late Joseph Pilates. Co-founders Moira and Lindsay G. Merrithew, along with a team of physical therapists, sports medicine and fitness professionals, have spent over two decades refining the STOTT PILATES method of exercise and equipment. This resulted in the inclusion of modern principles of exercise science and spinal rehabilitation, making it one of the safest and effective methods available. This clear and detailed approach forms the basis for STOTT PILATES training and certification programs. It’s used by rehab and prenatal clients, athletes, celebrities and everyone in between.

Wednesday, April 29, 2009

Pilates Breath, The Importance of Correct Breathing ; © Fiona Wilkinson

Proper breathing is essential to any Pilates routine. Although we breathe automatically, the way we breathe is a habit we establish over time via our neurological system.

How we breathe is related to our physical state as well as our mental and emotional well being. Apart from helping rid the body of toxins, exercising our internal muscles and elongating the spine, working with our breath helps centre the mind and relieve tension. Not breathing properly while practicing Pilates will result in a half-hearted workout.

How to Breathe Correctly
In his book Return to Life, Joseph Pilates wrote: “Before any real benefits can be derived from physical exercise, one must first learn how to breathe properly. To breathe correctly you must completely exhale and inhale, always trying very hard to squeeze every atom of impure air from the lungs, in much the same manner you would wring every drop of water from a wet cloth.”

Our main breathing muscle is the diaphragm which is found beneath the lungs and contracts downwards to bring air into our body. It only relaxes when we exhale. If we are not relaxed in our rib cage area, our bodies retain air which accumulates at the bottom of our lungs and can hinder efficient breathing. By exhaling completely we improve the exchange of good air for bad air and keep our lungs fresh and clean.

Breathing and the Abdominal Muscles
Another good reason to focus on exhaling while doing Pilates is apart from ridding the body of bad air, our secondary breathing muscles, the ones responsible for helping with exhalation, are our abdominal muscles. By fully exhaling, you are also performing a full abdominal contraction. Even without flexing our trunk, when we deflate our torsos, the rib cage and abdominal cavity can descend. This releases the surface abdominals and activates our transverses abdominus, a key core muscle supporting the abdominal wall.

Breathing Awareness
There is no doubt that awareness of breathing can naturally help release tension in the body, rather like a good sigh. When you relieve your body from holding in too much air, you can take a nice deep breath of fresh air and feel more relaxed. Focusing on your breath will help achieve a sense of ease in your body, one of the principle benefits of practicing Pilates. The key to this is awareness. If we are conscious of our breathing habits we can start to feel how our diaphragm works and how the action of breathing affects the way we use our other core muscles.

Attention to breathing while practicing Pilates will improve your focus and concentration and give a sense of flow and rhythm to your movements. When you’re fully connected to your breath, you will feel lighter and the exercises will seem easier. Next time you do your workout, try letting your breath move you instead of the other way around. Experiment and enjoy it. But most of all, remember to breathe!

(taken from http://pilates.suite101.com/article.cfm/pilates_breath by Fiona Wilkinson

"Pilates' Return to Life Through Contrology" by Joseph H. Pilates & John Miller

Buy "Pilates' Return to Life Through Contrology" by Joseph H. Pilates & John Miller at http://www.amazon.com/Pilates-Return-Life-Through-Contrology/dp/0961493798

This book represents the first major publication in 1945 by Joseph H. Pilates and William J. Miller detailing the exercises, poses, and instructions fundamental to the matwork developed by Joseph and Clara Pilates. Based on his concepts of a balanced Body and Mind, drawn from the approach espoused by the early Greeks, these are the exercises that currently sustain a worldwide revolution in fitness strategies and exercise techniques.

From the Back Cover: This book represents the first major publication in 1945 by Joseph H. Pilates and William J. Miller detailing the exercises, poses, and instructions fundamental to the matwork developed by Joseph and Clara Pilates. Based on his concepts of a balanced Body and Mind, drawn from the approach espoused by the early Greeks, these are the exercises that currently sustain a worldwide revolution in fitness strategies and exercise techniques.
Joseph Pilates has been nothing short of revolutionary in his impact on the world of fitness and exercise. You will learn in this book the original 34 exercises that he taught to his students, many of whom have become exercise gurus in their own right. These carefully designed exercises constitute the results of decades of scientific study, experimentation and research into the variety of physical ills that upset the balance of body and mind.

Pilates makes extraordinary claims about the benefits of his defined science of "Contrology". The exercises shown in this book constitute the breadth of his original definition of Contrology, and are basic to the growing army of worldwide trainers whose teachings rely on the instructions contained in this book. Living testimony to the validity of his own teachings, the photographs of this book are of Joseph Pilates himself at age sixty!

In this book, you will learn the exercises that Joseph Pilates recommended to accompany the basic advice (offered separately in his book, Your Health - see below) regarding posture, body mechanics, correct breathing, spinal flexibility, and physical education. It is fascinating to study these exercises and to discover the origins of what is being taught by fitness enthusiasts, health educators, and exercise trainers around the world.

(taken from the Editorial Review at http://www.amazon.com/Pilates-Return-Life-Through-Contrology/dp/0961493798)

Joseph H. Pilates

Who is Joseph Pilates?

Joseph H. Pilates himself, born in Germany in 1881, a frail childhood inspired his keen interest in physical fitness regimens. He studied yoga, Zen meditation, martial arts and other exercise techniques and became an accomplished gymnast, diver and boxer.

In the 1920s he devised a unique sequence of movements that worked the mind and muscle in harmony. While interned in England during the First World War, he refined his technique for his fellow internees. While working as a hospital orderly, he used bed springs to offer light resistance exercises to patients, an idea which later evolved into the
Pilates Cadillac or Trapeze Table.In 1926, Joseph Pilates moved to New York and opened up the first Pilates studio (referred to as "Contrology" back then) along with his wife, Clara Pilates. Among his clients were dancers such as Martha Graham and George Balanchine, who appreciated how the exercise method created long, lean muscles without building bulk. Soon, some of his students ("disciples") began opening studios of their own. Joseph was an icon of fitness until he was 87, when complications from a fire took his life in 1967. However, his legacy lives on as Pilates exercise has become one of the most popular and respected fitness systems practiced around the world.

(taken from http://www.pilatesinsight.com/pilates/joseph-h-pilates.aspx)
http://pilatesinsight.com/